
With Smart Rules in Sage Intacct, you can ensure data integrity across your system, avoid common errors in data entry, and customize your workflows to meet your specific needs. This blog will guide you through building logic into your environment without the need of a developer with smart rules and smart events.
Creating a Smart Rule
To begin, navigate to:
Applications Menu > Platform Services > Smart Rules
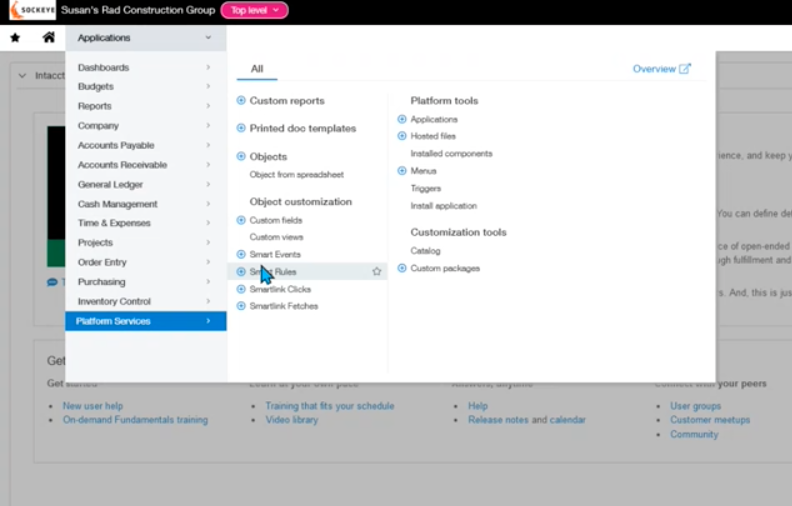
The purpose of a smart rule is to create a rule that generates an error when the rule is violated. To create a rule, select Add from the top right corner.
Step One: Owner Object
In our example, we will set the owner object as Vendor for the first step.
Step Two: Rule Properties
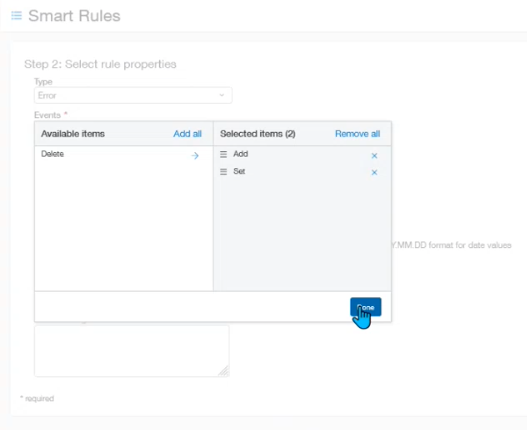
In step two, you can select the rule properties. For the type, you have the option between error and warning. Error is a hard stop, while a warning just gives a pop-up window that users can skip over. In our example, we want an error so that people are unable to continue.
For the events of your smart rule, you may choose from add, edit or delete. When we create a vender, we need to add and edit, but deleting won’t be necessary. If there are situations where you do not want things to be deleted, you can add rules on delete.
The next section is where you set your condition. For this, it’s helpful to think of it as what Sage Intacct triggers when you break the rule you are creating. To create this code, use the field lookup button in the top right corner. In that window, you can see all the data points on the vendor record that we can use to drive the information for the rule. For our scenario, we will look at the Vendor Type ID.
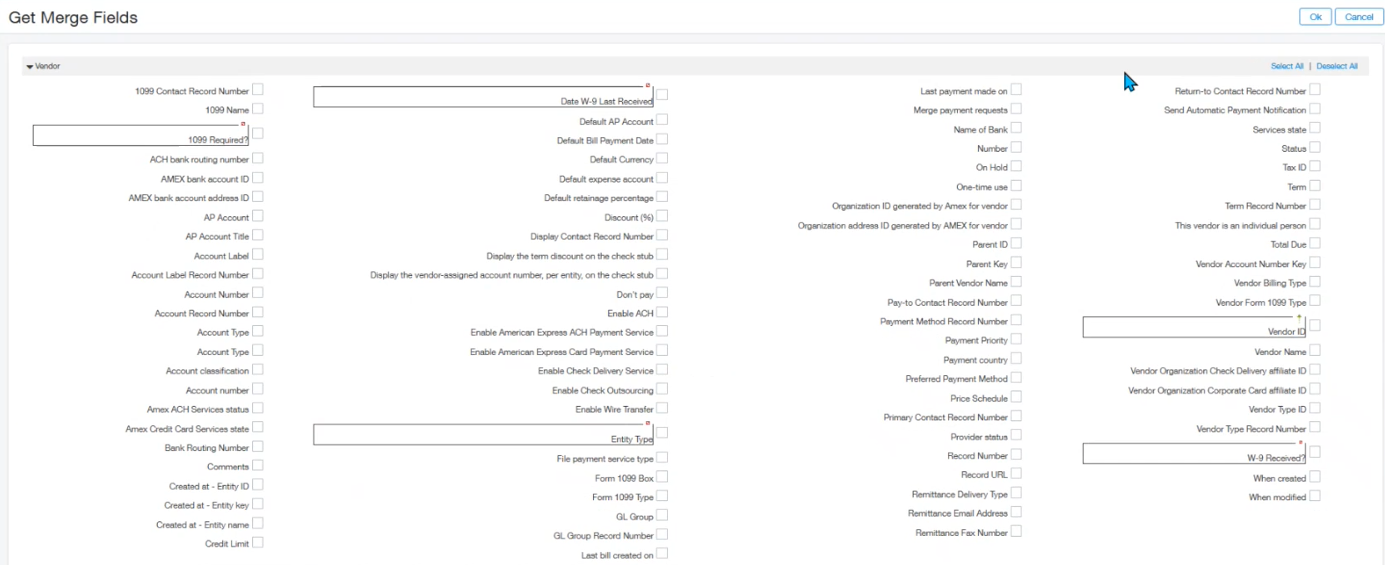
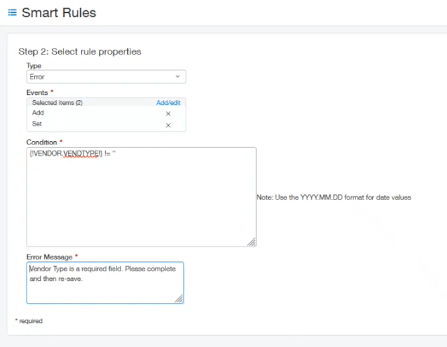
For our example, we will select the Vendor Type ID and click Done in the top right. For the rest of the code, we do not want the Vendor Type ID to equal blank, so the code will be:
(VENDOR VENDTYPE!) != ‘’
For the last section of step two, enter the error message you would like to appear when the rule is violated.
Step Three: Deployment Options
In this step, you will give the rule an ID, description, and status of your choice.
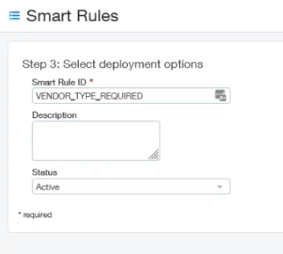
When finished, select Done from the top right corner. At this point, if you go through the process and test the rule, it should give the error or warning upon violating.
Creating a Smart Event
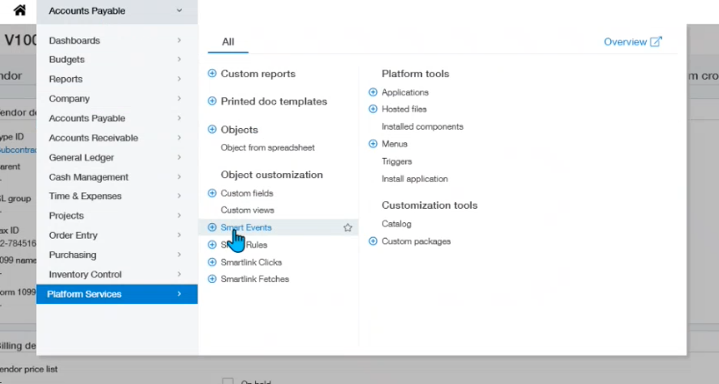
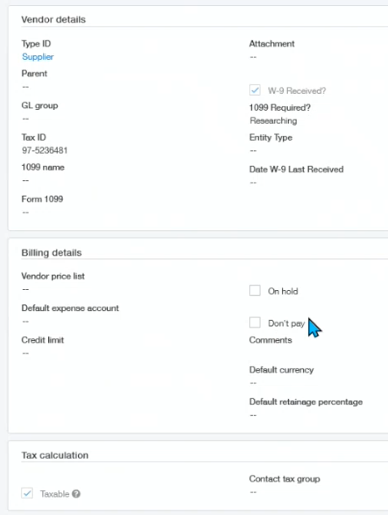
For our example, we will create a smart event for some custom fields we previously created. In a vendor, there is a custom field asking if the W9 has been received. We want to create a smart event where if the W9 has not been received, we don’t want them to get paid. To begin, navigate to:
Applications Menu > Platform Services > Smart Events
Step One: Owner Object
In step one, it will be the same as creating a smart rule, and we will choose Vendor for our owner object.
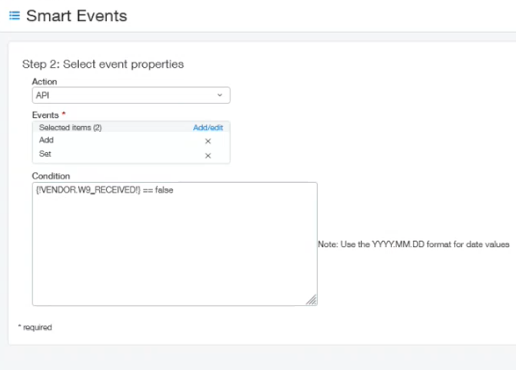
Step Two: Event Properties
When you create a smart event, the action options are email, http post, log, or API. For our scenario, we want the action to be making an API call because we want to update that record. For our events, we will select Add and Set.
Lastly, for the condition of a smart event, think of it as what we want the system to do when the condition is met. In our scenario we will have the condition be (VENDOR, W9_RECEIVED!) == false.
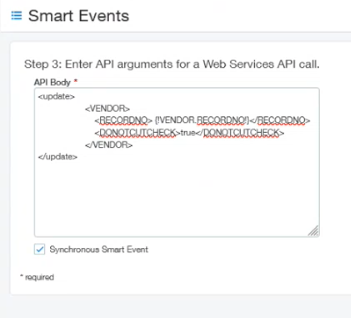
Step Three: API Arguments for a Web Service API Call
In the last step, we want the API call to update to not allow payment. The easiest way to do this is to go into the Intacct Developer API library, where you can copy and paste short code that is already pre-written to help you update what you are trying to do.
For our scenario, our code will tell the system to look up the vendor record number, and when the condition (set in step two) is satisfied, it will not pay.
Lastly, we want to check the Synchronous Smart Event box, because this will immediately change it, while leaving Synchronous unchecked means it is not tied to the user permissions and it will take 30-60 seconds to update. In other words, depending on who is making the updates and if they have access to do these functions will determine whether it is synchronous or not.
Step Four: Deployment Options
Similar to the smart rules, you will give your smart event an ID, description, and Status of your choice.
Now if you run through the process that your smart event is based off of, it will prompt the chosen action upon the condition written.
You may also create a second smart event if it has been unsatisfied. The most efficient way to do this is to duplicate the first smart event, switch the condition to true, update the API body, rename it and click Done. For our scenario, this allows for the smart event to fix it for you if you forget to check the W-9 Received box.
Overall, smart rules and smart events are a beneficial tool that can help you streamline processes, ensure data integrity, avoid errors, and customize your workspace. Please feel free to reach out to one of our sockeye consultants with any further questions.
About the author
Susan joined the Sockeye team as a self-starter Senior ERP Consultant with more than 50 Sage Intacct implementations under her belt. At Sockeye, she specializes in the construction and real estate industry, while also working on implementations in the airline industry as well.
Susan Delawyer, ERP Business Consultant
Watch the Video Overview of this Topic
View a video presentation on this topic here and browse through more Sage Intacct Tips & Tricks on our Video Insights page.
