
Sockeye’s Ownership Module designed to track ownership structures across multiple entities in Sage Intacct
Article by: Sydney Haslett, ERP Department Manager
This blog explains how the ownership module that our application team has built on top of Sage Intacct addresses the need to track complicated ownership structures across multiple entities, both for reporting purposes and distributions.
The underlying structure uses statistical accounts and AP processing, but it enables users to view, transfer, and distribute cash from a streamlined UI. This module helps make the process of tracking ownership much more efficient.
Using the Ownership Module
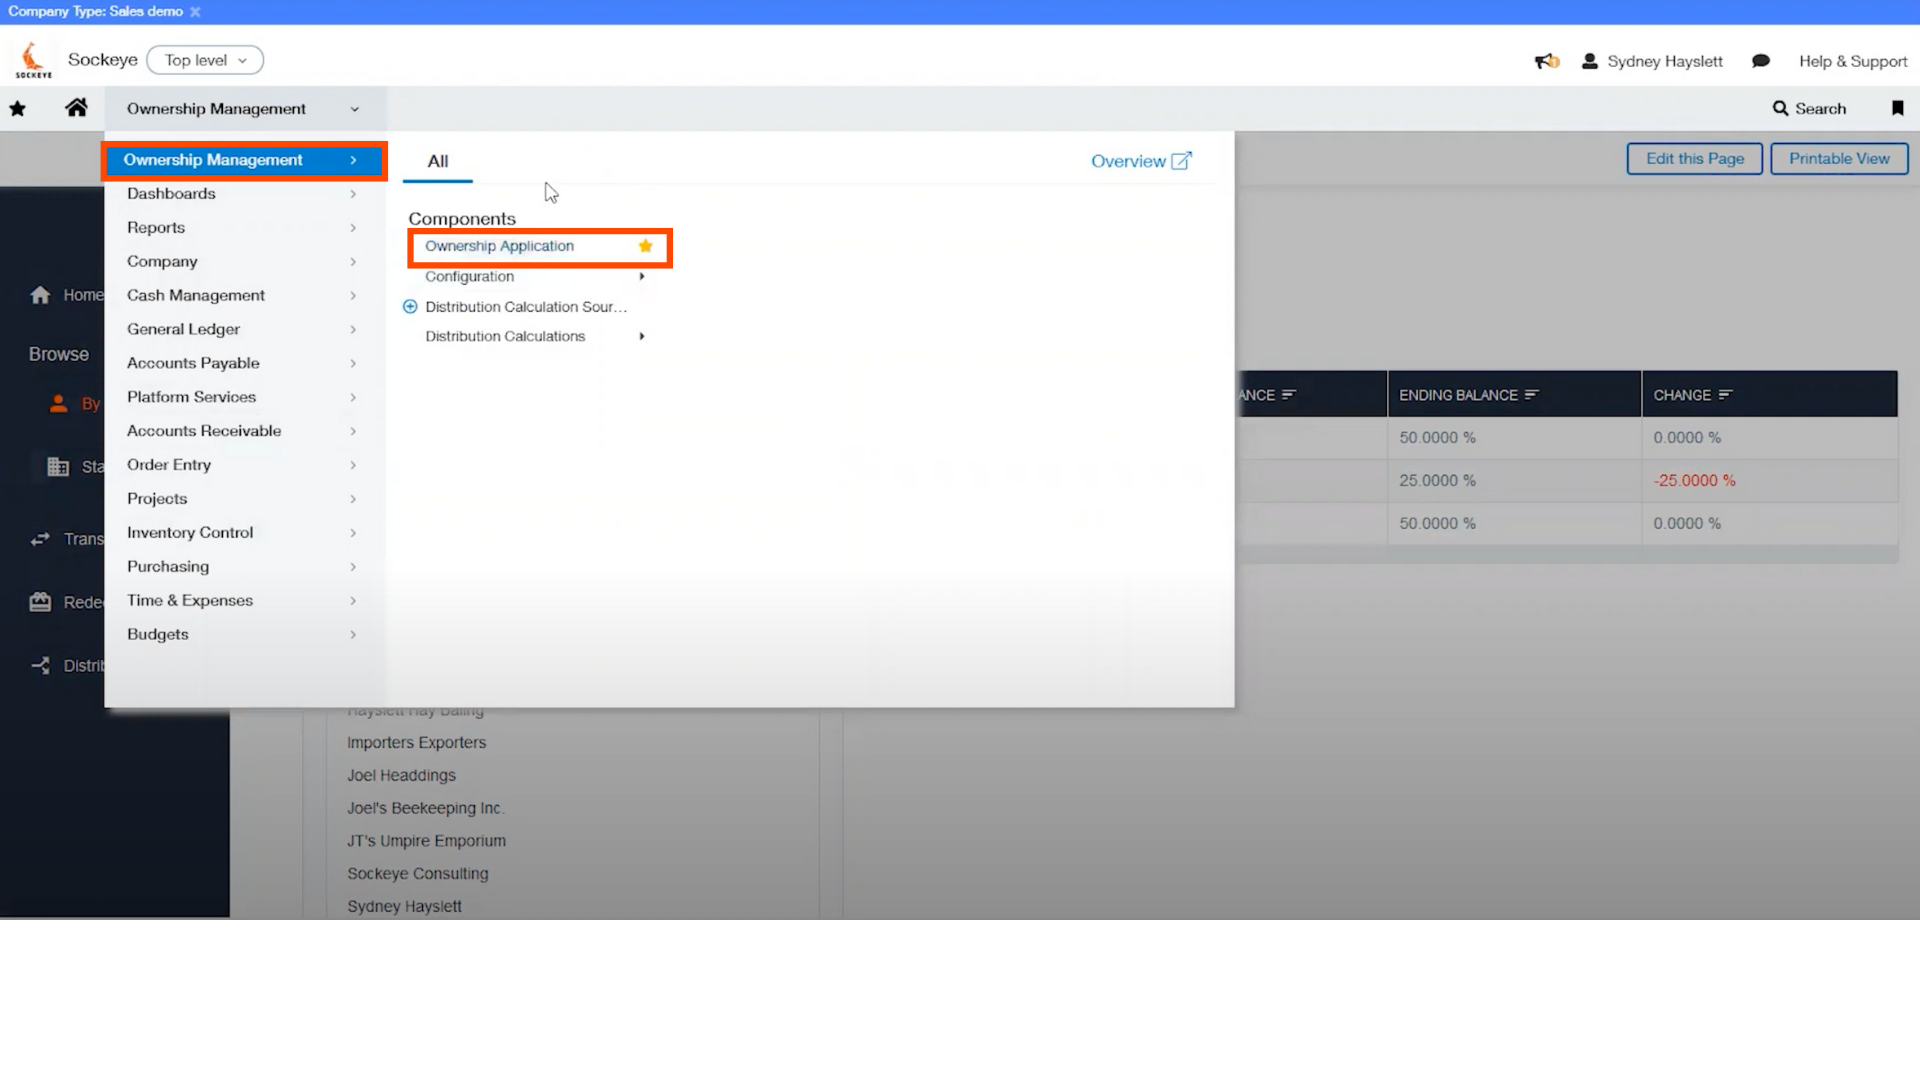
To begin, navigate to the top left corner where you will see the ownership management module, which appears like any other module in Sage Intacct.
Clicking the Ownership Application will bring you to the homepage of the application.Click Ownership Management > Ownership Application > Homepage
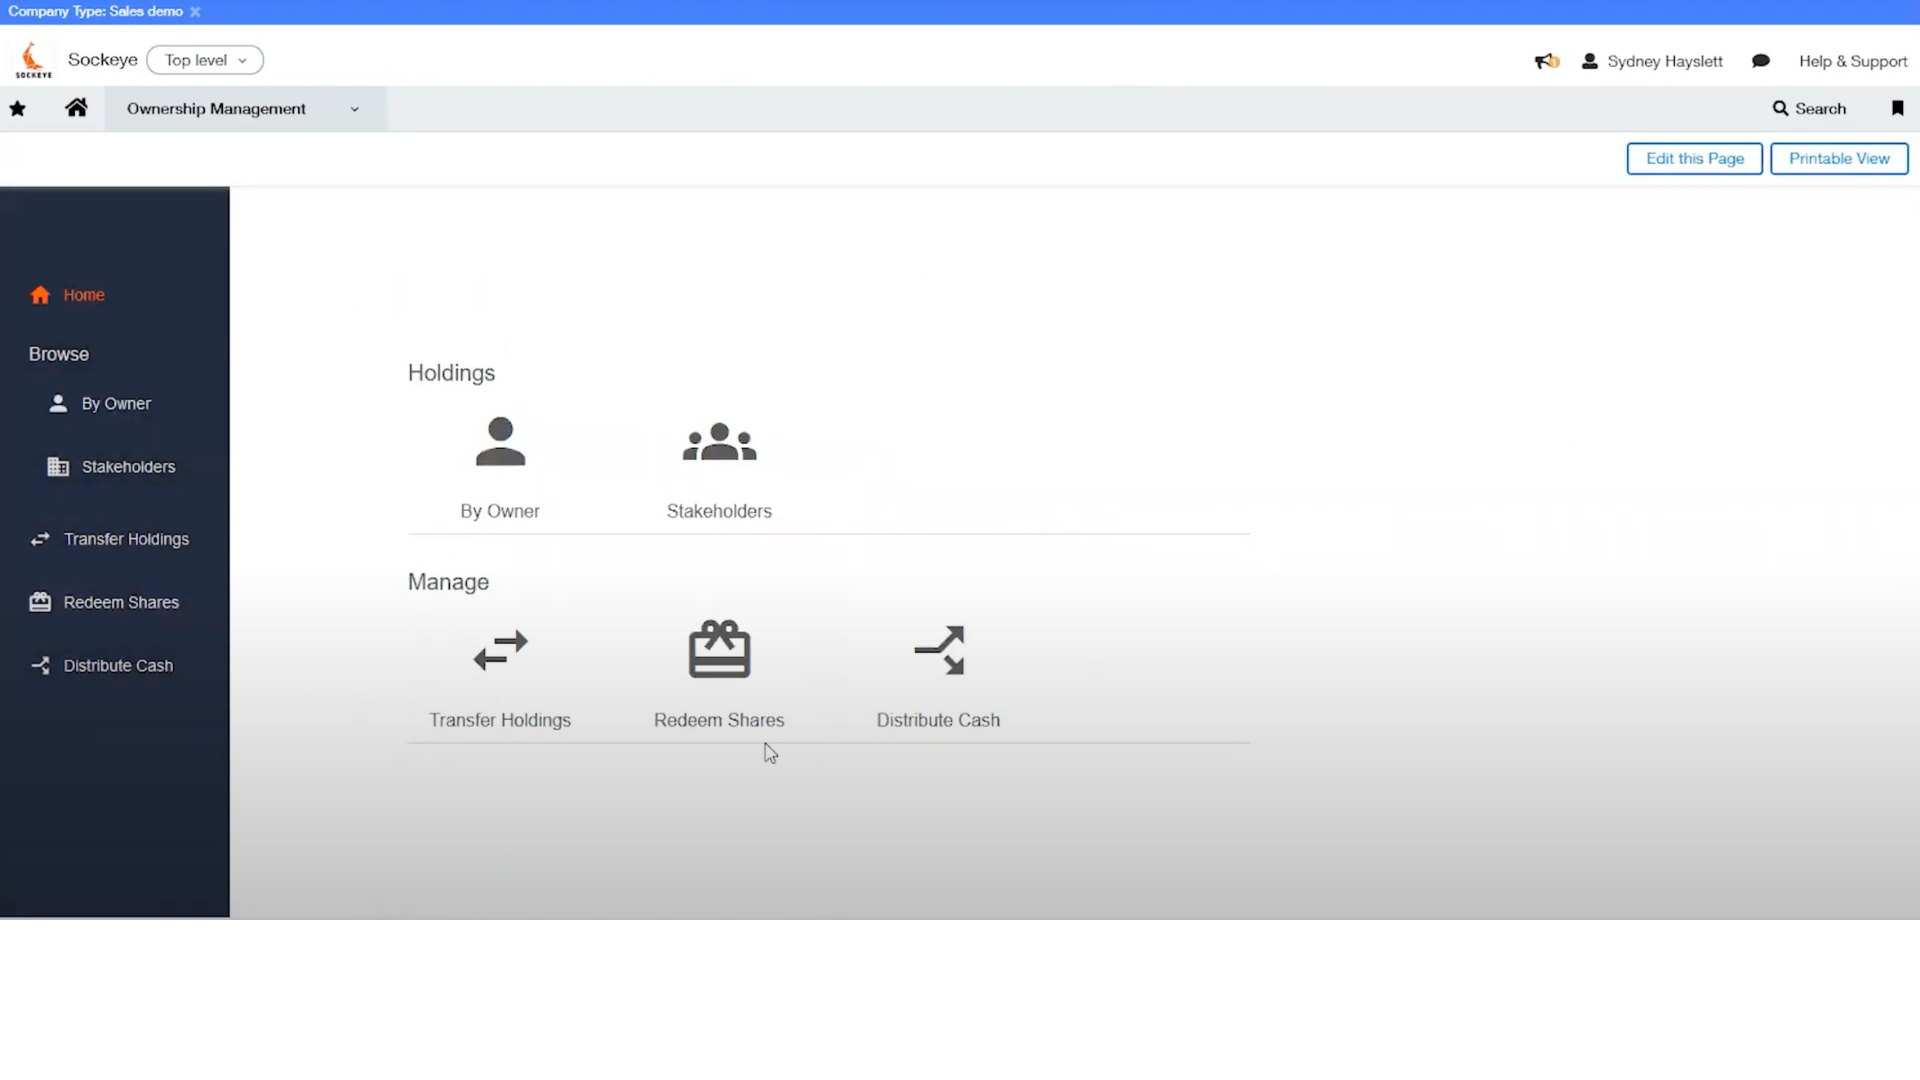
View Owners Holdings
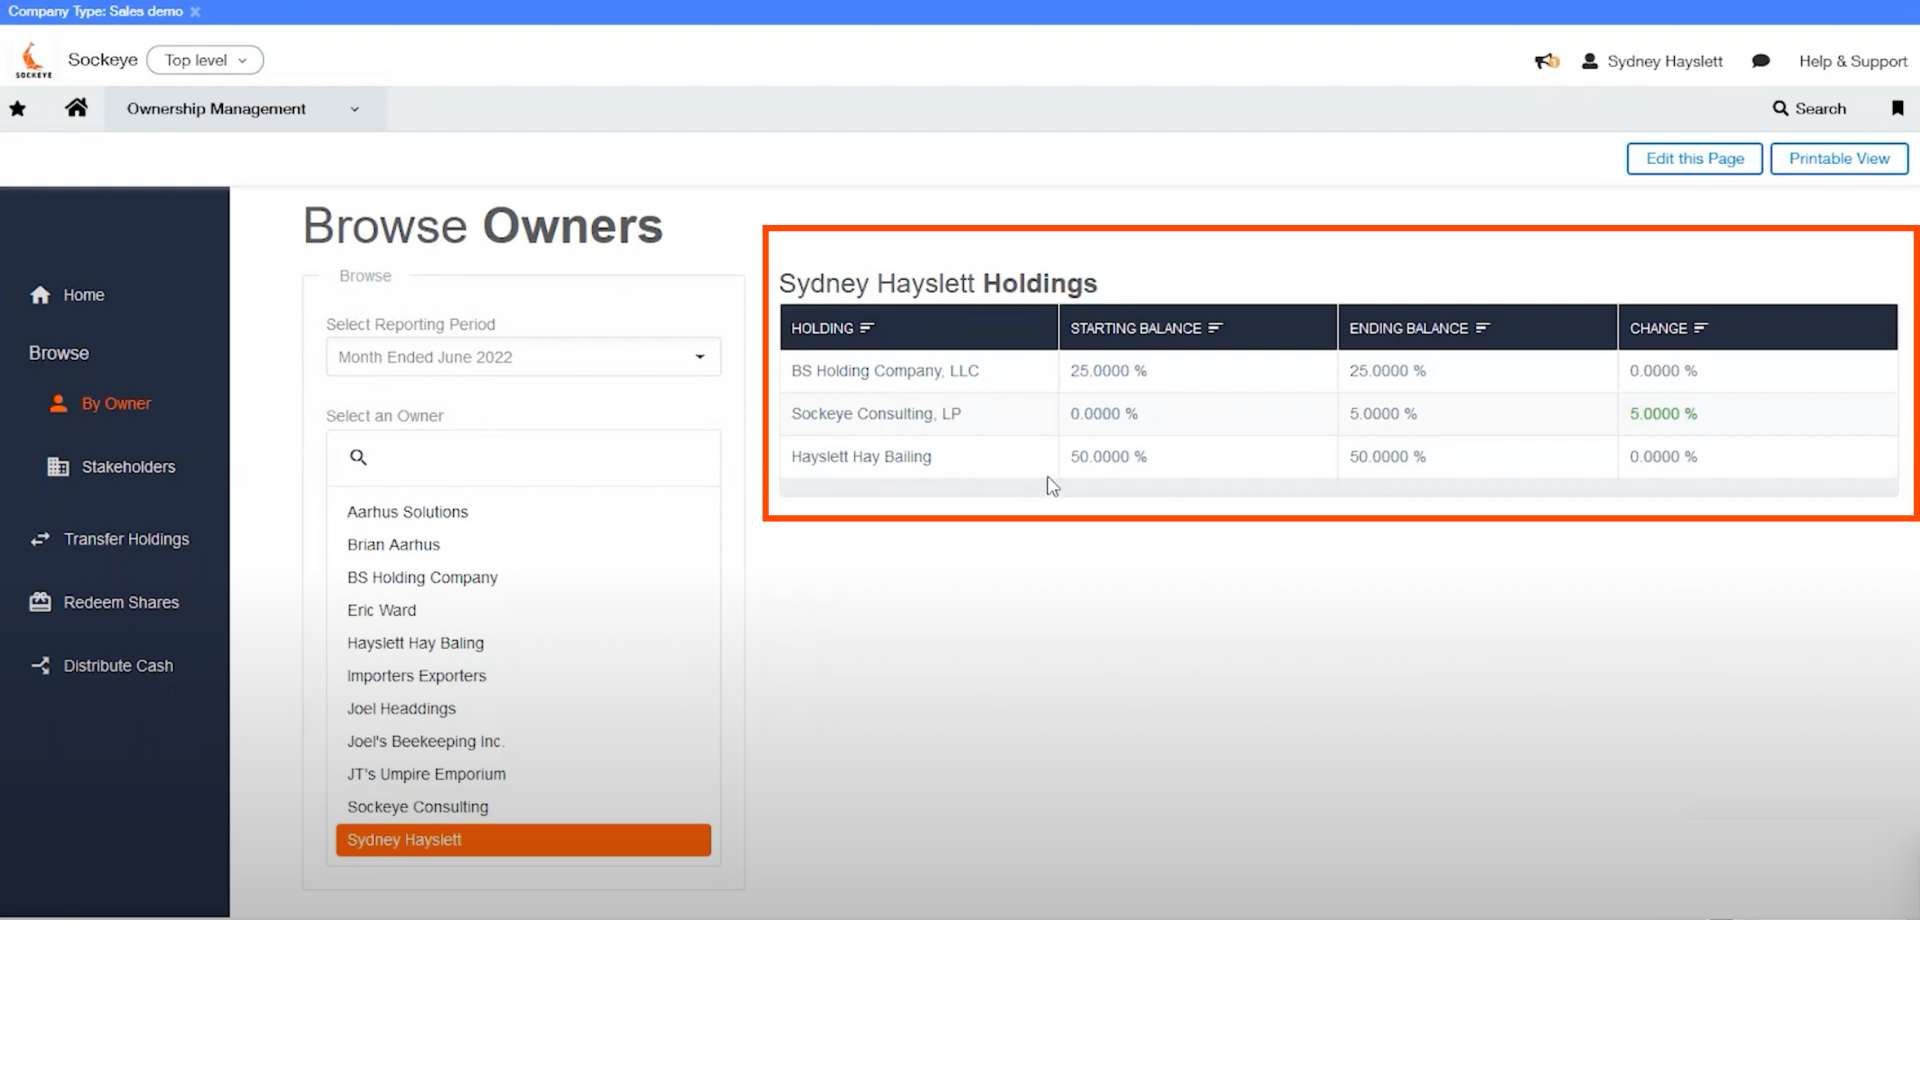
To populate your holdings, you must select a reporting period and select which owner to look at.
It will display all of their investments across the multi-entity structure. The table will show you what was changed during the selected period as well. Any of the reporting periods in Intacct are available in the dropdown menu (see below).
Side Menu > Browse > By Owner
View Stakeholders Holdings
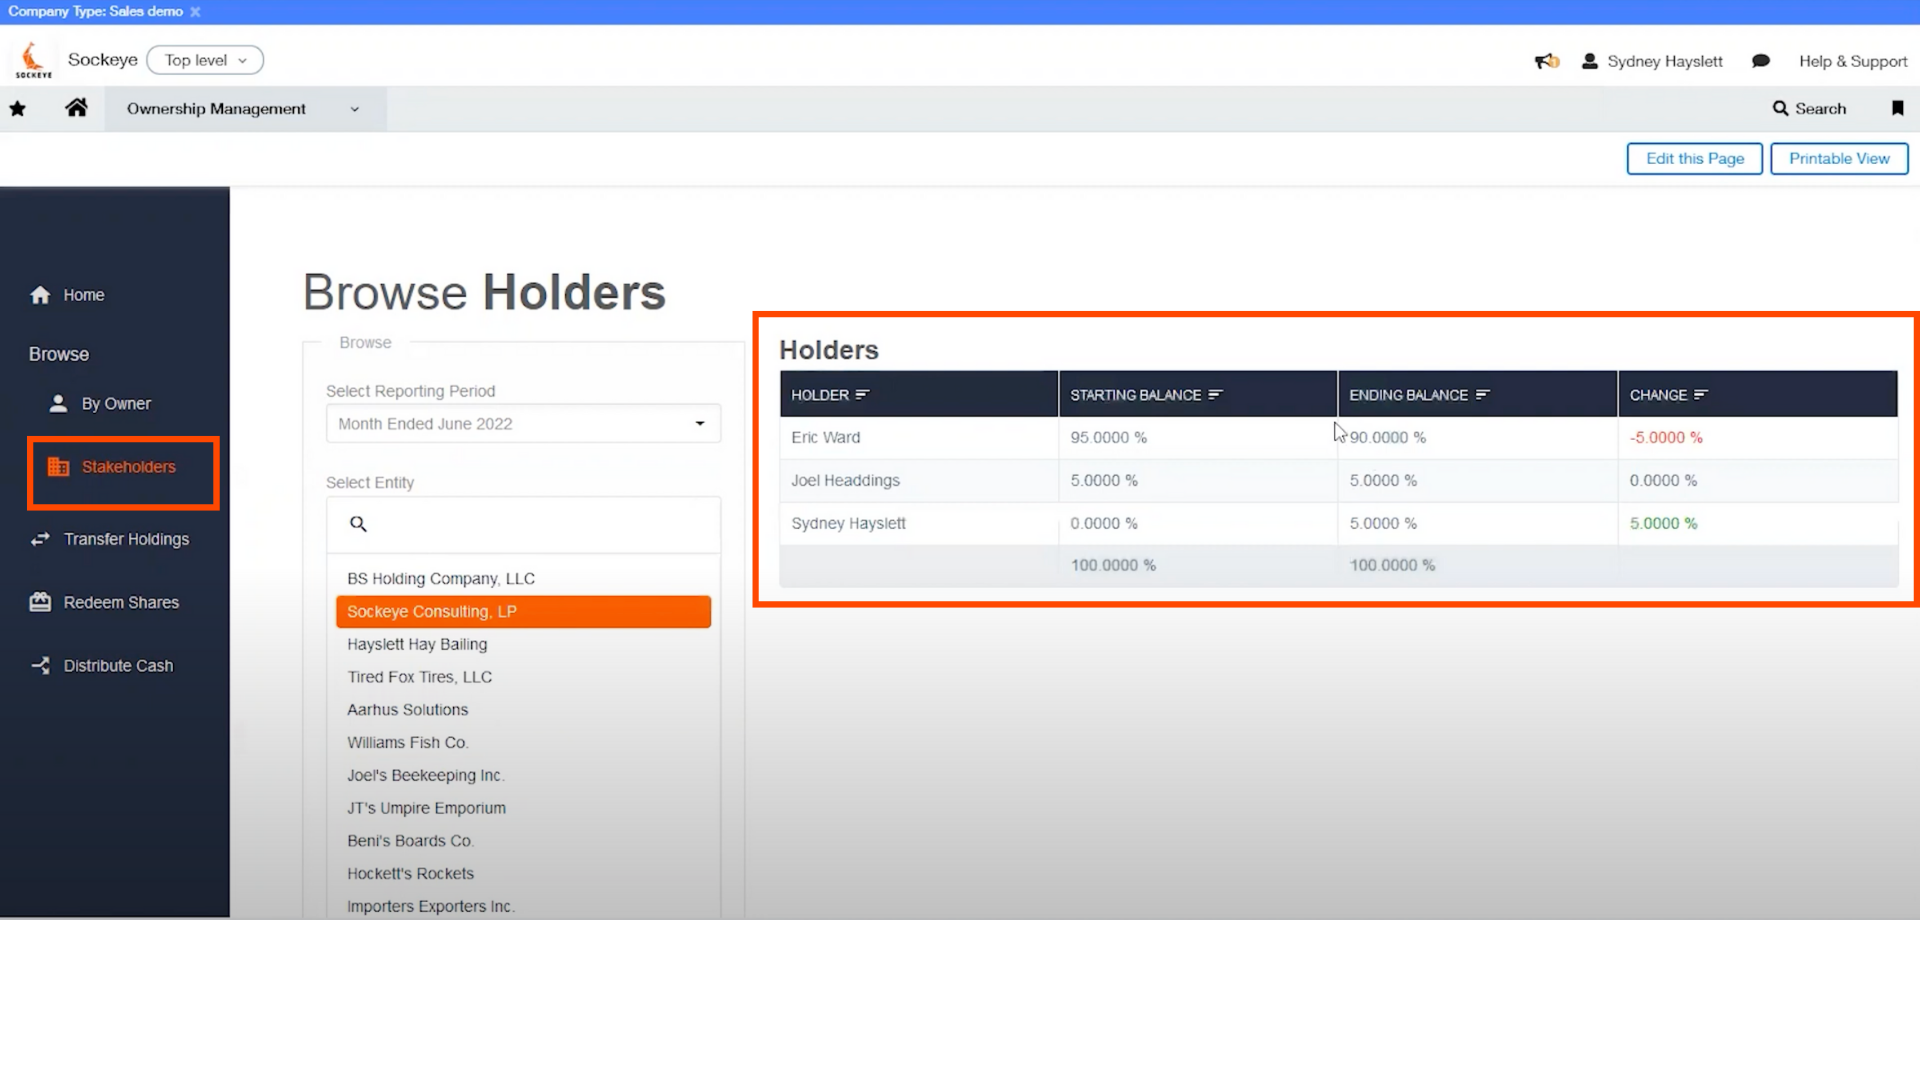
If you take a look at the Stakeholders section on the side menu, it will show the opposite perspective.
If you choose the same period as you did for the owner view, it will show the ownership in that entity and the change of where ownership transferred during that period as well.
If it has multiple owners, they’ll be listed out with each of their percentages at the start of the period, the end of the period, and any changes during the period.
Side Menu > Browse > Stakeholders
Transfer Holdings
Next you can press review, make sure everything looks correct, and post that transfer. It will now be reflected in the statistical accounts that can be used in reporting.
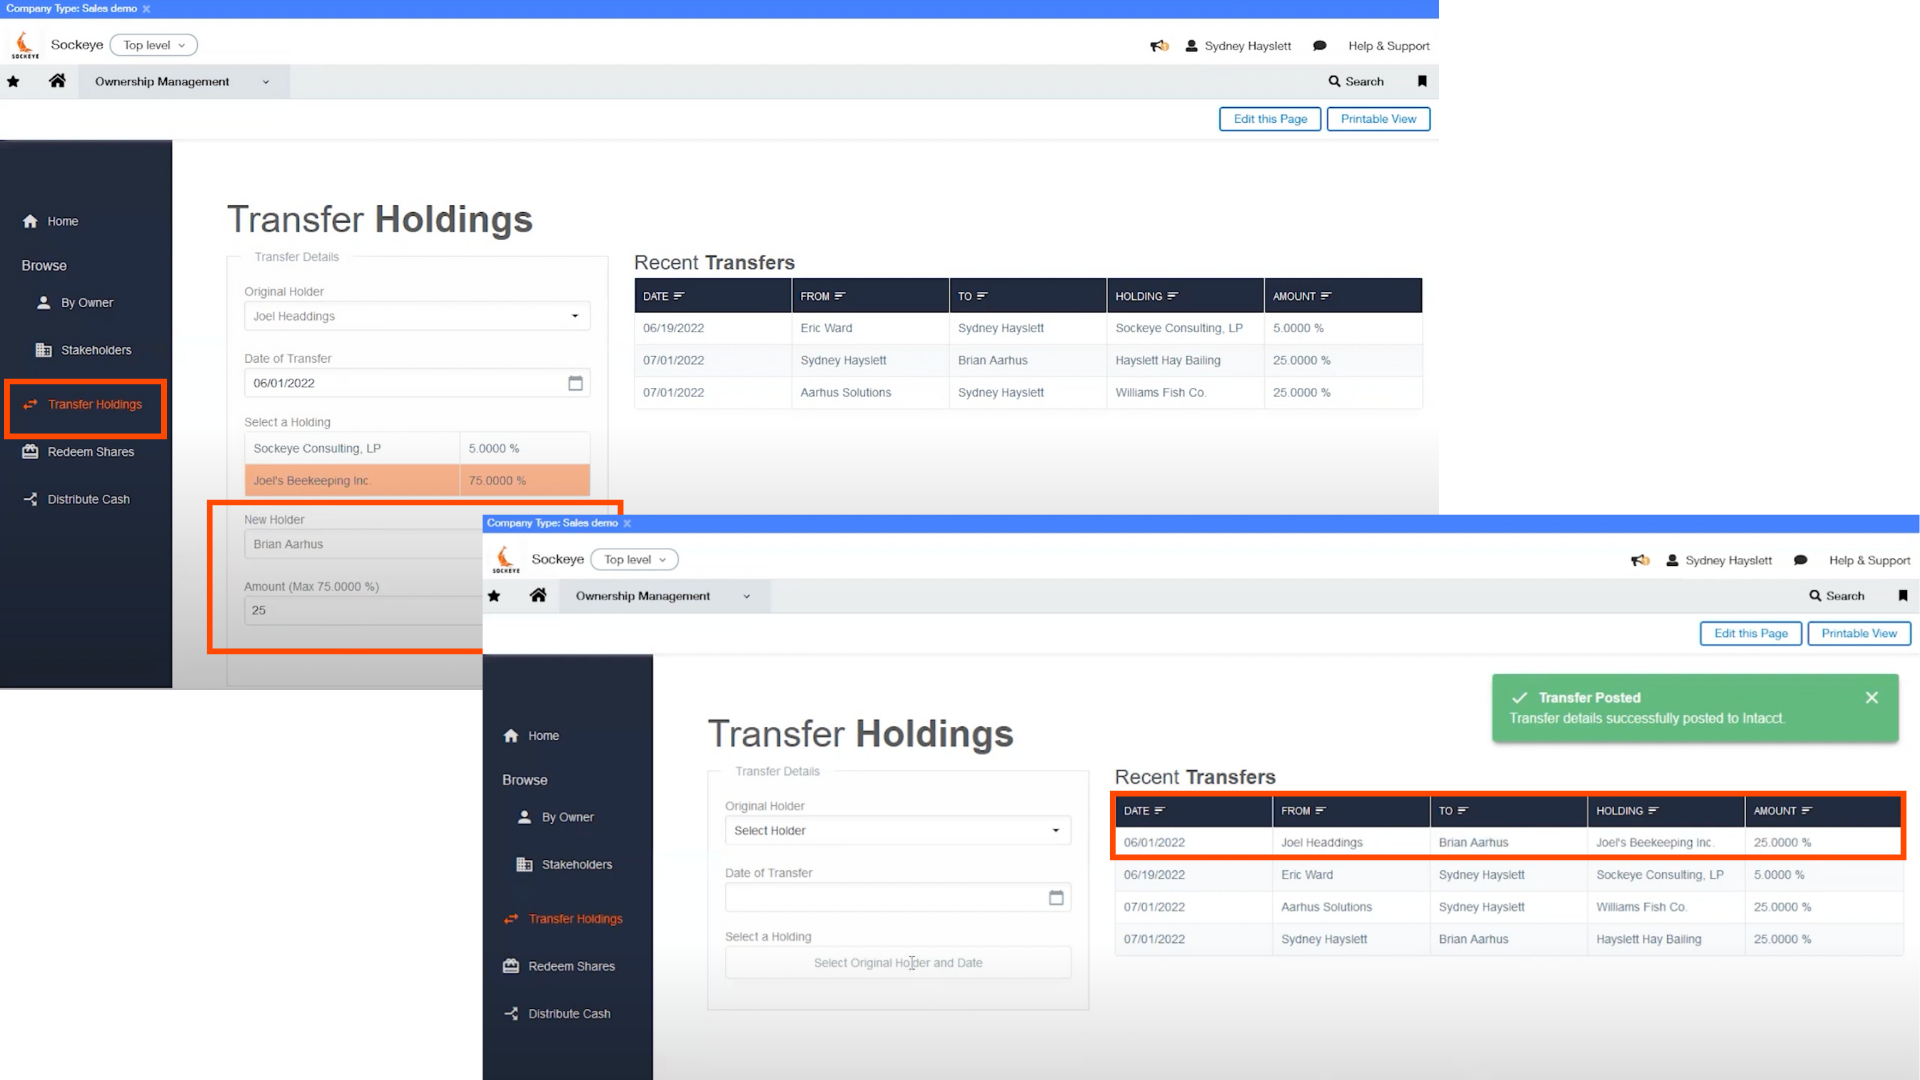
Distribute Cash
The last section of the ownership module that will be looked at is how to distribute cash. First, verify that you are in the entity level by checking or changing it in the top right corner (see below).
Change Entity Level from "Top Level"

In the entity level side menu or on the home page, select Distributing Cash.
Select a period that you would like to distribute cash for and this will show the amounts from different investment distributions. This is configurable by either a percentage of a GL account or a specific amount during the selected period.
Side Menu > Distribute Cash
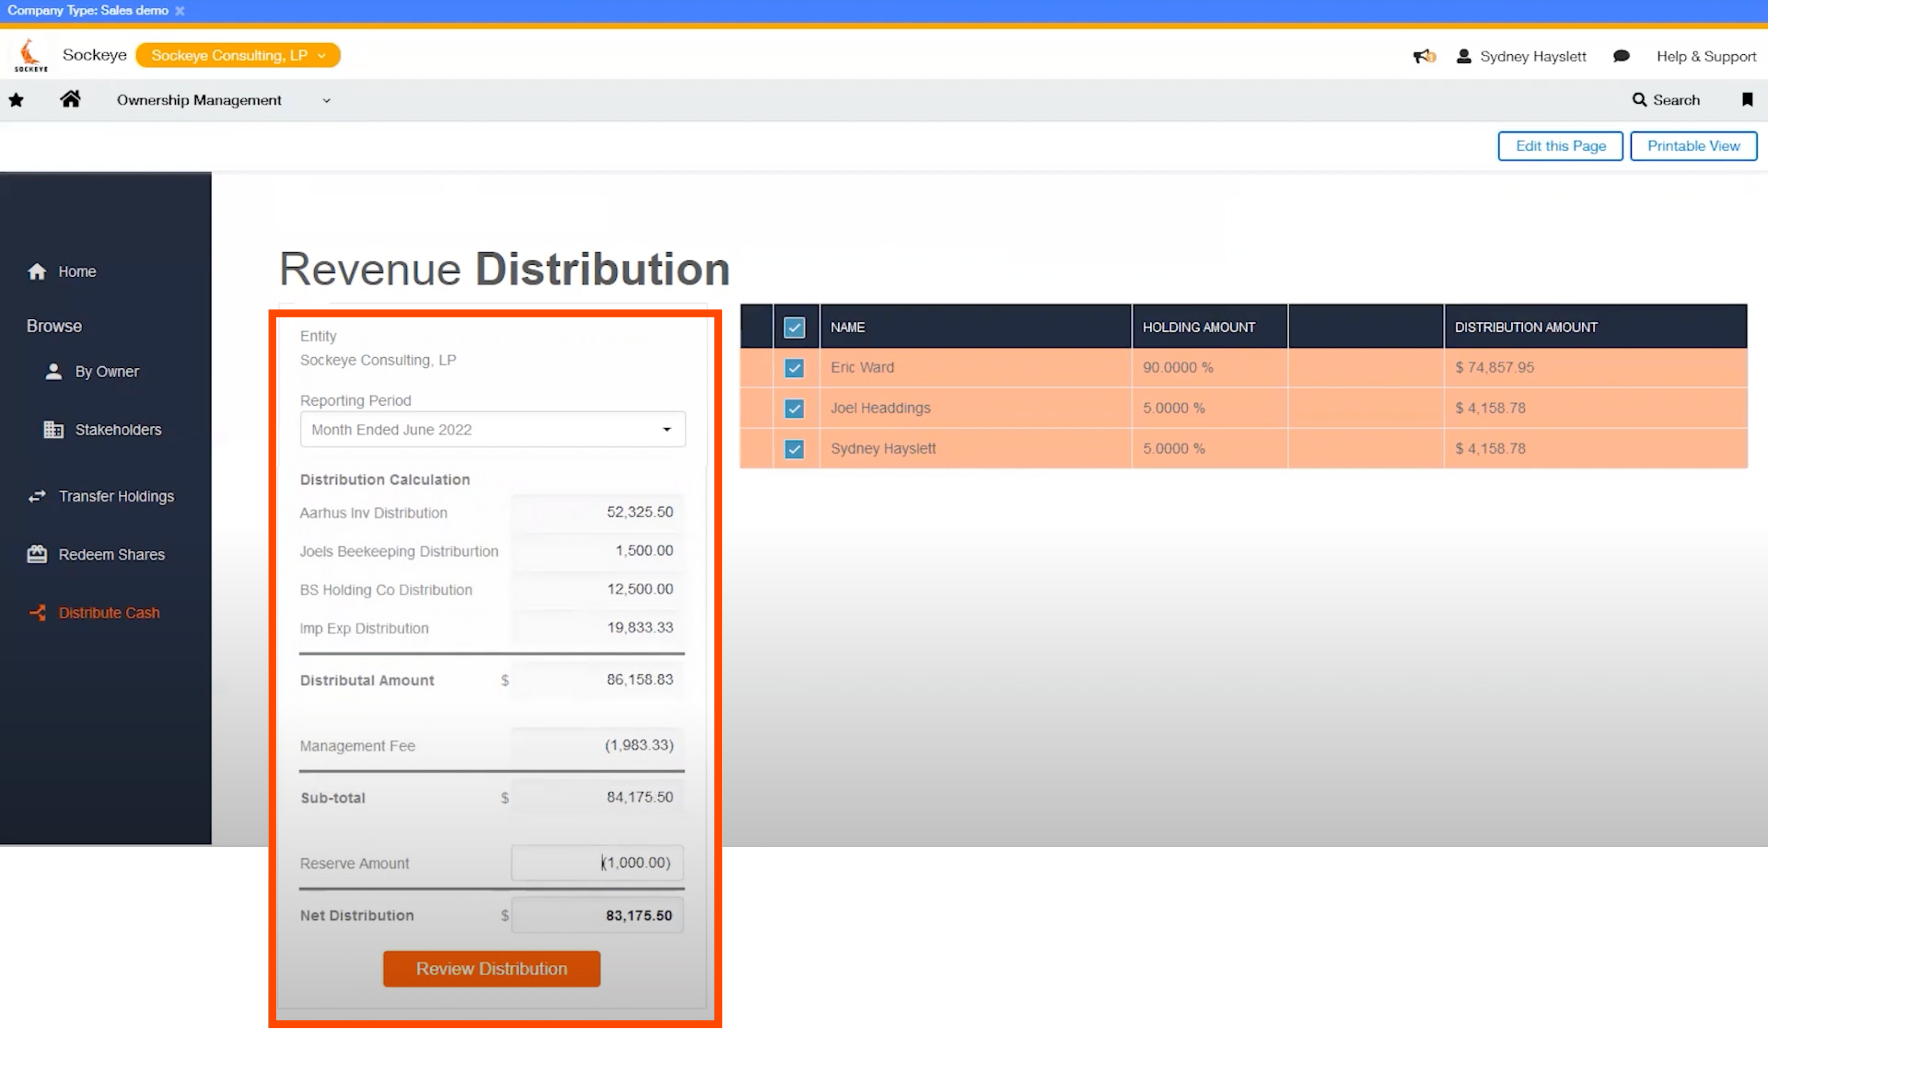
In addition, you will see a subtotal of the distributions and a management fee. This is also a configuration from a distribution amount. The management fee could also be a preferred amount to a certain investor or anything that needs to be paid out before your distributing cash can be set in the calculation configuration.
When you scroll down, you will see your new subtotal and an input field for reserve amount. You can allow an input of any amount so that you stay within the entity and not be distributed. This amount will change the net distribution available based on all of the numbers in the configuration.
When you are finished entering the numbers, click Review Distribution to check that everything is correct. After confirming the distribution details, select post revenue distribution on the bottom right. You will see a pop up saying it was successfully posted. Once completed, you will have those AP bills available to process the same way checks or ACH’s are processed to get money out to your owners.
Watch the Video Overview of this Topic
View a video presentation on this topic here and browse through more Sage Intacct tips & tricks on our Video Insights page.
If you have any questions or would like a live demo on this product, feel free to reach out to one of our Sage Intacct experts and learn how we can extend the functionality of Intacct through customization and development.
About the author
With a decade of accounting experience and 7 years working with Sage Intacct under her belt. As ERP Team Lead, Sydney is a champion of the system who is focused on driving internal initiatives and facilitating individual team member growth in order to create efficiencies and improve workflows for the organization as a whole.
Sydney Hayslett, ERP Department Manager
